


Set Up Bitdefender WebShield in 5 Easy Steps!
Hey there, internet explorers! Ever clicked a link that looked legit, only to realize it was a shady site trying to steal your data? Yeah, I’ve been there. As a cybersecurity consultant who’s spent years helping small businesses lock down their systems, I’ve seen how sneaky hackers can be with malicious websites. One wrong click can lead to malware, phishing scams, or worse. That’s why I swear by Bitdefender WebShield—it’s like a digital bodyguard for your browsing. In this article, I’m sharing my go-to guide for setting up WebShield in five simple steps, based on my own experience keeping my clients’ systems safe. Whether you’re a tech newbie or a seasoned pro, you’ll be blocking hackers in no time. Let’s dive in!
Why Bitdefender WebShield is Your Online Shield
What’s WebShield All About?
Bitdefender WebShield is a feature baked into Bitdefender’s antivirus products, like Total Security or Antivirus Plus. It scans websites in real time to block anything sketchy—think phishing pages, malware downloads, or fraudulent sites. It works across browsers like Chrome, Firefox, and Edge, and it’s super lightweight, so it won’t slow down your surfing.
When I first started using WebShield for a client’s small business, I was amazed at how it caught a phishing site that looked exactly like their bank’s login page. Without WebShield, they might’ve lost sensitive data. It’s like having a security guard who checks every website’s ID before letting you in.
Why You Need It
Malicious websites are everywhere—over 1.1 million phishing sites were reported in 2024 alone, according to the Anti-Phishing Working Group. WebShield stops these threats by:
Blocking in Real Time: It scans URLs as you browse and halts dangerous ones instantly.
Protecting All Users: Great for families, teams, or anyone sharing a device.
Staying Out of Your Way: It’s fast and doesn’t bog down your browser.
For my clients, WebShield has been a lifesaver, especially for those who aren’t tech-savvy. It’s like giving them a safety net so they can browse worry-free. Curious? Check out Bitdefender’s official site for more on their security tools.
What You’ll Need to Get Started
Before we jump into the setup, here’s what you’ll need:
Bitdefender Software: A subscription to a product like Bitdefender Total Security or Antivirus Plus.
Supported Devices: Works on Windows, macOS, or Android (sorry, iOS users—WebShield is desktop-focused).
A Stable Internet Connection: Needed for real-time scanning and updates.
Updated Browsers: Ensure Chrome, Firefox, or Edge are up to date for the best experience.
I always tell my clients to double-check their Bitdefender subscription before starting. I once had a client try to set up WebShield with an expired license—total facepalm moment. Save yourself the trouble and confirm your account is active.
5 Easy Steps to Set Up Bitdefender WebShield
Here’s the exact process I use to get WebShield running for my clients. It’s quick, painless, and takes about 10 minutes.
Step 1: Install Bitdefender
First, you’ll need Bitdefender installed:
Head to Bitdefender’s website and download your chosen product (I recommend Total Security for all-around protection).
Run the installer and follow the prompts to set it up.
Activate your subscription with your license key, which you’ll find in your purchase email or account dashboard.
When I set this up for a client’s team, we went with Total Security because it covers multiple devices. The installation took less than five minutes, even on older PCs.
Step 2: Enable WebShield
Once Bitdefender is installed:
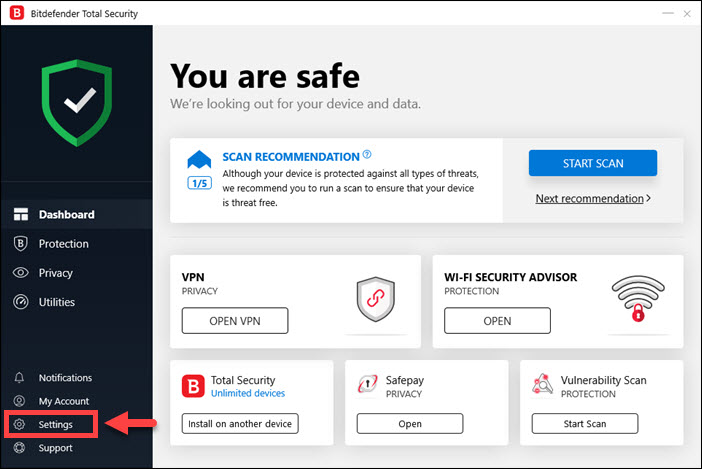
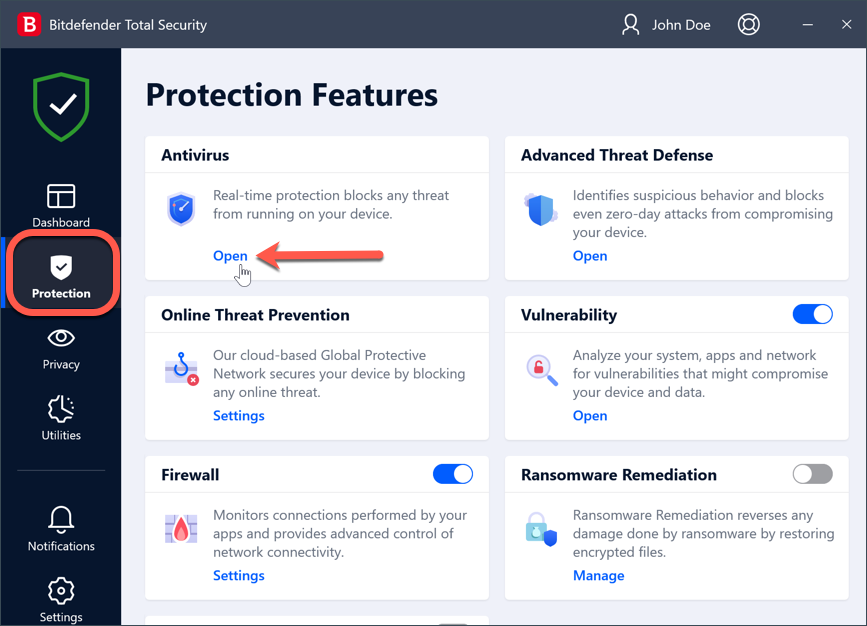
Open the Bitdefender app (find it in your system tray or applications folder).
Go to the Protection tab on the left.
Look for Online Threat Prevention or Web Protection (the name varies by product) and toggle WebShield to On.
I once forgot to enable WebShield after installing Bitdefender for a client’s laptop. They called me in a panic when a shady pop-up appeared. Lesson learned: always double-check this step!
Step 3: Set Up Browser Integration
WebShield works best with Bitdefender’s browser extension:
In Bitdefender, go to Settings > Web Protection and click to install the extension for your browser (Chrome, Firefox, or Edge).
Follow the browser’s prompts to add the extension.
Test it by opening a browser and checking for the Bitdefender icon (usually a green shield).
For one client, I set up the extension on Chrome and Firefox because their team used both. It’s a small step, but it ensures WebShield catches threats across all your browsing.
Step 4: Customize WebShield Settings
WebShield is ready to go out of the box, but tweaking it makes it even better:
In the Web Protection settings, enable Encrypted Web Scan for HTTPS sites (most modern websites).
Turn on Block Notifications if you don’t want pop-ups for every blocked site (I prefer this for a quieter experience).
Add trusted sites to the Whitelist if WebShield blocks something legit, like an internal company portal.
I had a client whose company intranet kept getting flagged. Adding it to the whitelist took two seconds and solved the issue. Don’t be afraid to fine-tune these settings to fit your needs.
Step 5: Test WebShield
Make sure WebShield is working:
Visit a safe test site, like Bitdefender’s test page, to see WebShield block a fake malicious link.
Browse a few trusted sites (like your email or news sites) to confirm they load normally.
Check the Bitdefender dashboard for any blocked threat notifications.
When I tested WebShield for a client’s retail business, it caught a phishing link disguised as a supplier’s invoice. Seeing that warning pop up was a huge relief—it meant their data was safe.

Best Practices to Keep WebShield Running Smoothly
Here’s what I’ve learned from years of using WebShield to protect my clients:
Update Regularly: Bitdefender pushes threat definition updates often. Enable auto-updates in the Settings > General tab to stay protected.
Check Notifications: WebShield logs blocked sites in the Bitdefender dashboard. Review them weekly to spot patterns (e.g., if someone’s clicking bad links repeatedly).
Educate Your Team: If you’re setting this up for a group, explain how WebShield works. I once ran a quick lunch-and-learn for a client’s staff, and it cut down on user errors.
Layer Your Protection: Pair WebShield with Bitdefender’s anti-phishing tools and firewall for extra security. It’s like locking all the doors to your digital house.
Troubleshooting Common WebShield Issues
Even a great tool like WebShield can hiccup. Here’s how I handle common problems:
WebShield Not Blocking Threats: Ensure it’s enabled in the Protection tab and your software is updated. A client once had outdated threat definitions, and a quick update fixed it.
Legit Sites Blocked: Add the URL to the whitelist under Web Protection > Exceptions. I did this for a client’s payroll site that kept getting flagged.
Extension Not Working: Reinstall the browser extension or try a different browser. Firefox gave me trouble once, but switching to Chrome solved it.
If you’re stuck, the Bitdefender Support Center has detailed guides and a helpful community.

Why WebShield is a Must-Have
After setting up WebShield for dozens of clients, I can say it’s one of the easiest ways to stay safe online. It’s saved my clients from phishing scams, ransomware, and data breaches, all while being so simple to use. Whether you’re protecting your personal laptop or a team’s devices, WebShield gives you peace of mind without slowing you down.
Ready to stop hackers in their tracks? Grab a Bitdefender subscription at www.bitdefender.com and follow these steps. Your browsing will be safer in minutes. Got a WebShield tip or story? Drop it in the comments—I’d love to hear how you’re staying secure!